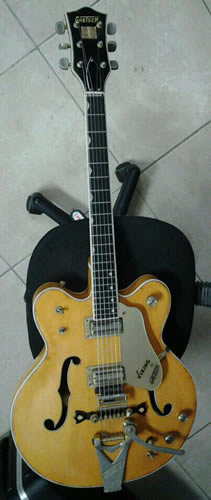
Hello again and welcome
to another installment of Luthier's Corner. This month,
I'd like to showcase a recent restoration I did on
a 1966 Gretsch Viking hollowbody electric guitar. The
guitar was brought to me because all of the original
binding had started to spontaneously combust, as is
usually the case with old celluloid binding. Take aclick
on and take a look at Pictures
A, Picture
B, and Picture C to
get an idea of the condition of the binding when it
first arrived. CAUTION: A rebinding job is a very intensive
job, and must not be attempted unless you are properly
trained. OK, that being said, the first thing I had
to do was, of course, remove all of the hardware, tailpiece,
bridge, tuners, etc. The controls and pickups did not
need to be removed. Once all the pertinent hardware
was removed, I started removing and replacing the binding
in each specific section, beginning with the fretboard.
Look at Picture D,
which shows how I carefully chiseled off the binding
from the fretboard. Once all the binding was removed
from the fretboard, I prepare the new binding, and
glue it in place, Picture E.
After the glue is dried, I remove the clamps and tape,
then scrape and sand the binding flush, drill and install
new side dots, and voila, the fretboard binding is
done.
Picture F.
Now it’s time to move to the
body. I start, first, with the top. It’s always
best to do one area of binding at a time, rather than
ALL of the binding on the whole guitar at once. That’s
why I started with the fretboard, completed that rebind,
and now will work on the top of the body. Picture
G shows how I carefully chisel off the old
binding. And Picture H shows
the new binding glued and tape clamped in place. Once
the glue is dry, the tape comes off and the binding
is ready for scraping, Picture
I. Picture J shows
me scraping the binding flush. And Picture
K shows the completed top binding.
Now it’s time to rebind the back
of the body. The process is the same. Picture
L shows me carefully chiseling off the
back binding. Once all the binding is removed, I clean
the binding channel of old glue and old binding fragments.
Then the channel is ready for new binding, Picture
M. And Picture N shows
the new binding glued and tape clamped in place. Once
the glue is dry, I remove the tape and begin carefully
scraping the binding flush, Picture
O. This process is repeated on the headstock,
as well as the heel cap on the back of the neck at
the body joint, etc. |
 |
she now has new life
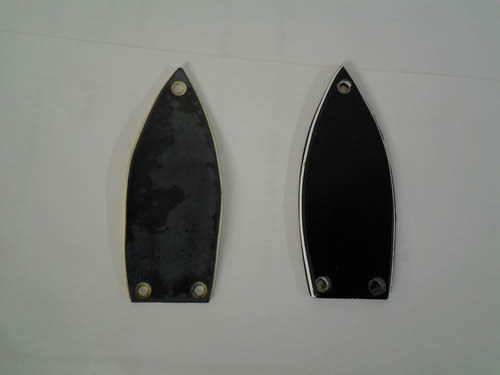
The last thing I needed to do was make a new truss rod
cover, to replace the warped and discolored old one. Picture
P shows the old one on the left, and the new one
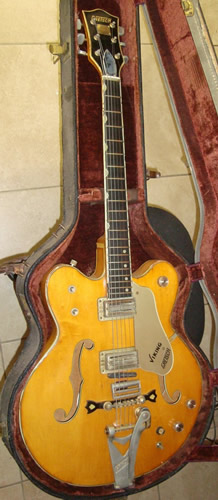
on the right. After installing the new truss rod cover,
reinstalling all the hardware, polishing the corrosion
off of the frets, and giving her a full setup with a new
set of strings, she now has new life, and is ready to go
for another 50 years. Picture Q. Here is
a link to a 27 video that briefly shows how this guitar
now looks: https://www.facebook.com/photo.php?v=573747392664992&set=vb.100000892103878&type=3
So you see, with a steady hand, a keen eye, and a LOT
of patience, you can take a guitar that is in rough shape,
and restore it to its former glory. You just have to have
the confidence to do so. Remember, if ANY project seems
like it may be too much for you, it is better to bring
it to a professional to do it right, than to perhaps cause
irreparable damage.
Well, I hope you found
this month’s
article informative and enlightening. Once again, thanks
for reading my column and remember no task worth accomplishing
is ever achieved if not pursued with fierce dedication.
Believe in yourself, and make happen that glorious noise
called music! Until next time, remember, there is nothing
you can't do if you set your mind to it! Cheers!! |